Jun 19, 2012

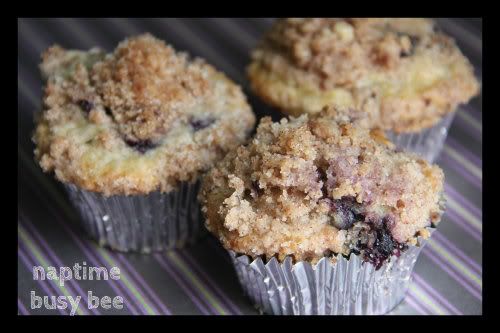
Tasty Tuesday: Blueberry Crumble Muffins

When I was little, I started a revolt against blueberries. They were gross, horrible, icky, and DEFINITELY had no business being in my breakfast. Thankfully I matured. Like 2 years ago. And decided blueberries were amazing - Especially in muffins! Enter these bad boys. Please, oh please, make these blueberry muffins for breakfast this weekend. They really shouldn't be classified as a breakfast food. I'm pretty sure they fall more in the dessert category. But, I won't tell if you won't...

Blueberry Crumble Muffins


Ingredients:
1/2 tsp Salt
2 tsp Baking powder
1/3 C Vegetable oil
1 Egg
1/3 C Milk
1 C Blueberries
Crumble:
1/2 C sugar
1/3 C flour
1/4 C butter
1 1/2 tsp Cinnamon

Preheat the oven to 400. Grease 12 regular muffin cups or line with muffin liners. Combine 1 1/2 cups flour, 3/4 cup sugar, salt and baking powder. Place vegetable oil into a 1 cup measuring cup; add the egg and enough milk to fill the cup. Mix this with flour mixture. Fold in blueberries. Fill muffin cups right to the top, and sprinkle with crumb topping mixture.

To make Crumb Topping, mix together 1/2 cup sugar, 1/3 cup flour, 1/4 cup butter, and 1 1/2 teaspoons cinnamon. Mix together and sprinkle over muffins before baking. Bake for 20 minutes.

(Fresh blueberries are always better, but if you want to use frozen, toss the bag into the fridge the night before. To use them, rinse the thawed (but cold!) blueberries in a colander and spread on paper towels to dry.)

Jun 12, 2012

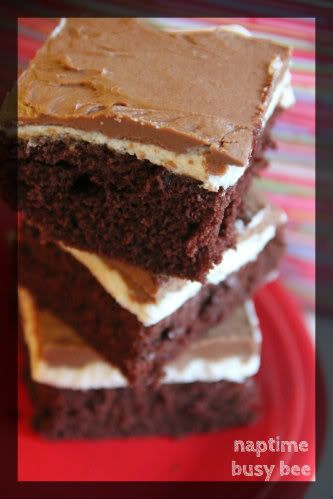
Tasty Tuesday: Ho Ho Cake

I'm a sucker for packaged, artificial, overly processed chocolate sometimes. Especially when it comes in the form of a little debbie cake or a hostess cupcake. Unfortunately, I finish eating one and then I feel like I ate wax and plastic. Icckkkkk. So, if you have similar cravings, please go make these today. (right now! Goooo!)

Ho Ho Cake


Ingredients:
1 Devils Food cake mix (and ingredients needed to make the cake)
5 T Flour
1 1/4 C. Milk
1 C. Sugar
1/2 C. Shortening
1/2 C. Butter
1 tsp Vanilla
3 oz Semi sweet chocolate
1 tsp Vanilla
2 1/2 T. Hot water
1/2 C. Butter
3 C. Powdered Sugar

Preheat oven to 350 degrees. Mix cake as instructed on box. Pour into a 16×11” pan and bake 20 minutes. Cool Completely. Heat flour and milk in saucepan. Cook until thick and then cool completely. Beat sugar, butter, shortening, and vanilla for 4-5 minutes or until creamy. Add cooled flour mixture and beat until smooth. Use it to frost the cooled cake and refrigerate for 1 hour or more. Melt chocolate. Mix together chocolate, vanilla, water, butter, and powdered sugar until smooth. Spread on white icing layer. Keep refrigerated.

Jun 11, 2012

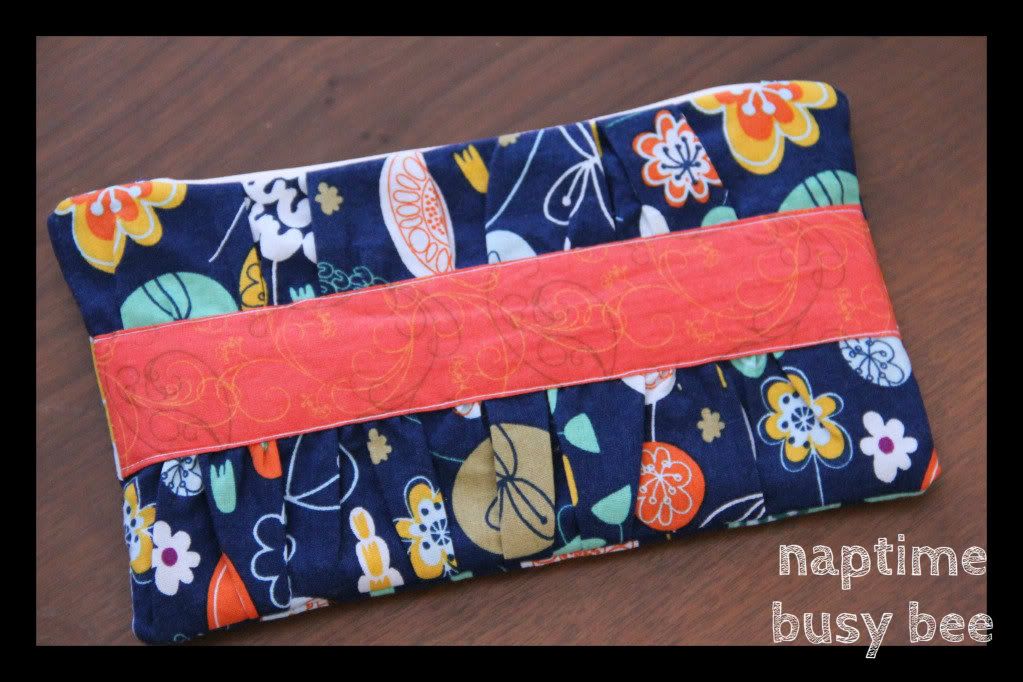
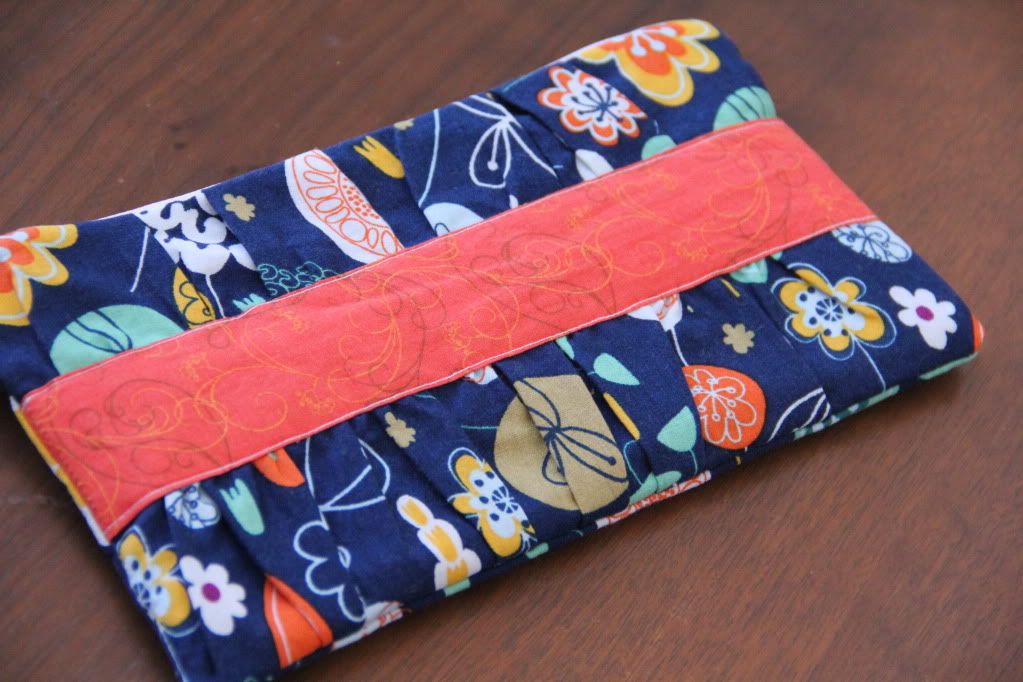
SewingBee: Gathered Clutch

I have a problem. It's called big-bag-syndrome. Those giant, colorful bag/purses calllllllmynameeeeeee! Unfortunately, I also suffer from 'gotta-big-bag-so-now-I-must-fill-it-all-the-way-up-itis'. Seriously, if there is space it must.be.filled. So for the sake of our chiropractor budget and my future scoliosis, I have given up my big bag ways. It's small purses for me, baby! Having to carry around only necessities/less junk is very freeing and makes me feel much more organized when I'm out and about.


I found this tutorial over at NoodleHead and thought it was so adorable I just had to try it. I'm excited to contain all my essentials on our upcoming vacation in such a cutesy clutch!
  **Note: I am not a hand model. I am in desperate need of a mani. The end**
 
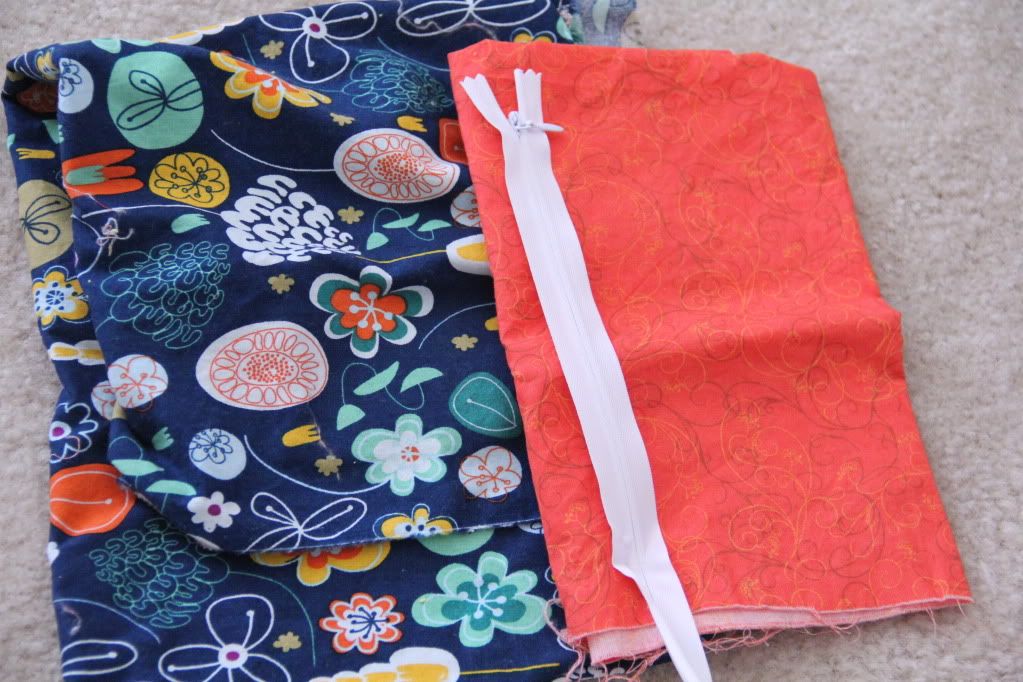
First things first - pick out some fabric! (Isn't this the best part? I heart fabric!) You'll need the following:

- 1/4 yard each of two coordinating fabrics (you'll definitely have scraps leftover)
- 8" zipper (you can always purchase a longer zipper and shorten it, just follow the directions on the package
- medium weight fusible interfacing
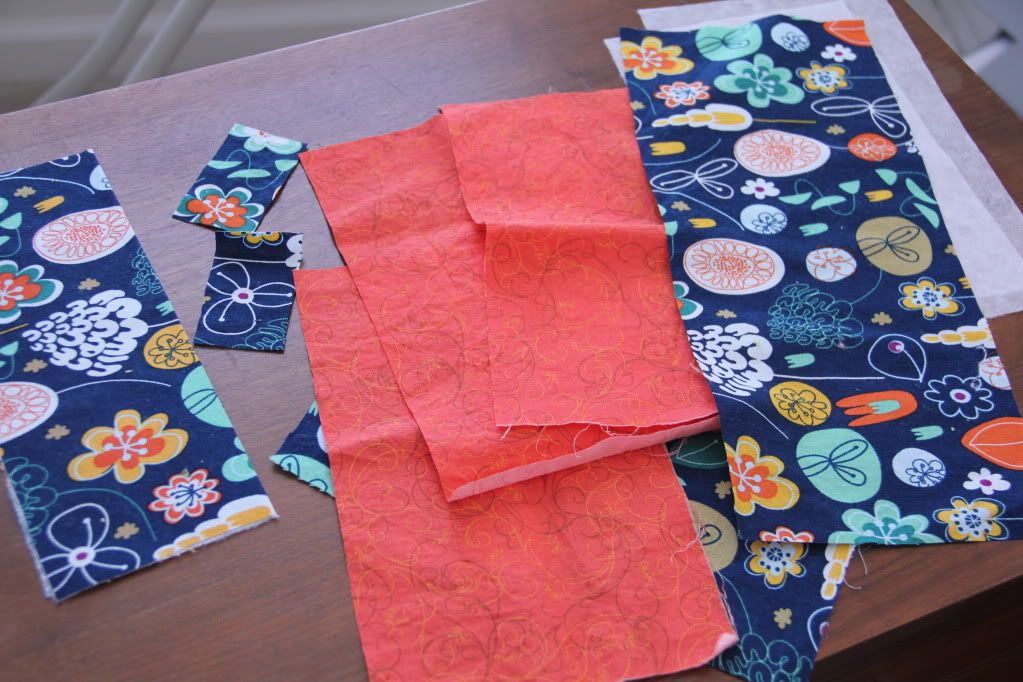
Next you'll want to cut all your pieces. This is the most time consuming part of the whole project! Cut the following:

Cutting the pieces:
For the main exterior, cut two pieces, one 5.5" tall by 9" wide, and one 5.5" tall by 13" wide (this will be the gathered front)
Pieces of medium weight fusible interfacing for exterior pieces of clutch: (2) 5.5" tall by 9" wide
For the front band, cut one piece 4" tall by 9" wide
For the lining, cut two pieces 5.5" tall by 9" wide
For the zipper end covers: two pieces 1.5" tall by 2.5" wide.
Optional Parts:
For the card holders, cut one piece 7" tall by 9" wide (apply interfacing to half, you'll need at 3.5" x 9" piece)

Now you're ready to sew! Use a 1/2 inch seam allowance unless otherwise specified.

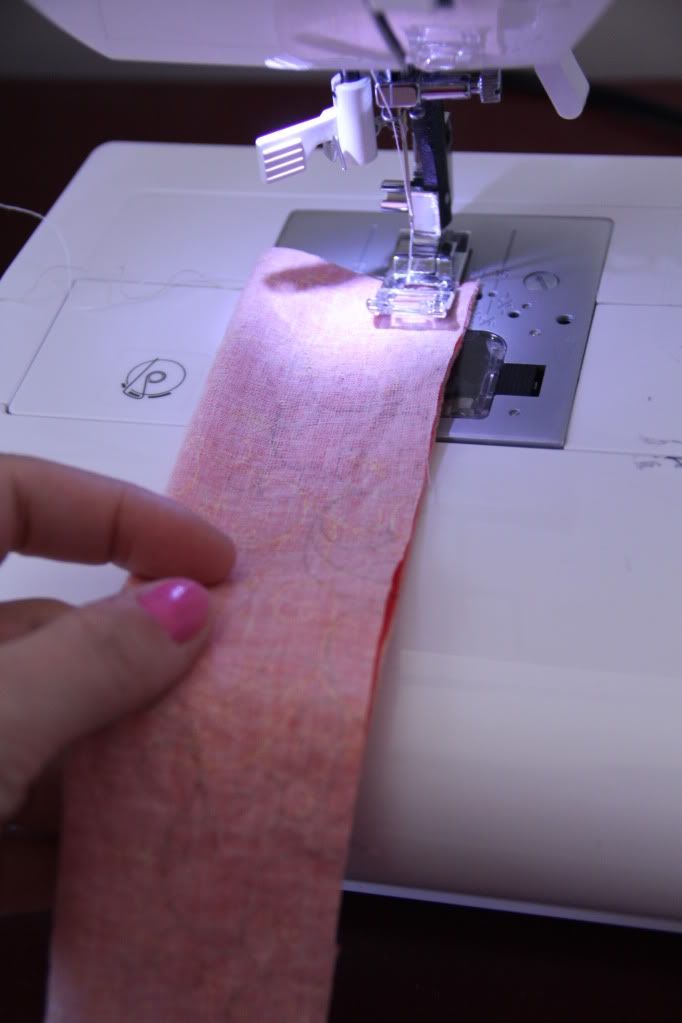
Take the front band piece (4"x 9") and sew the long ends with right sides of fabric together.
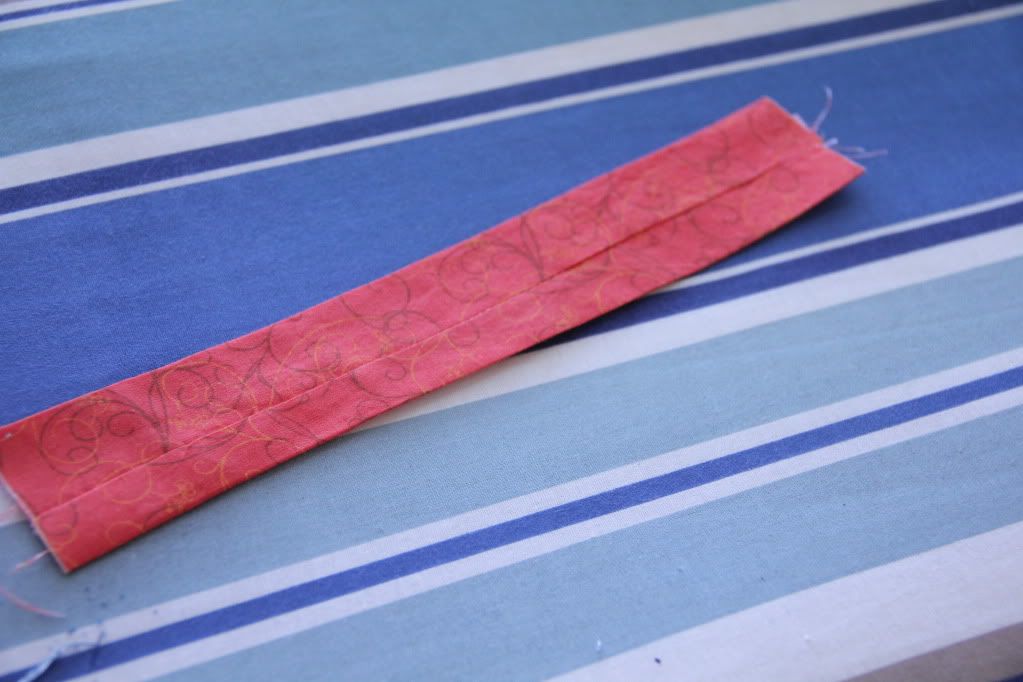
Turn inside out and press with the seam in the middle
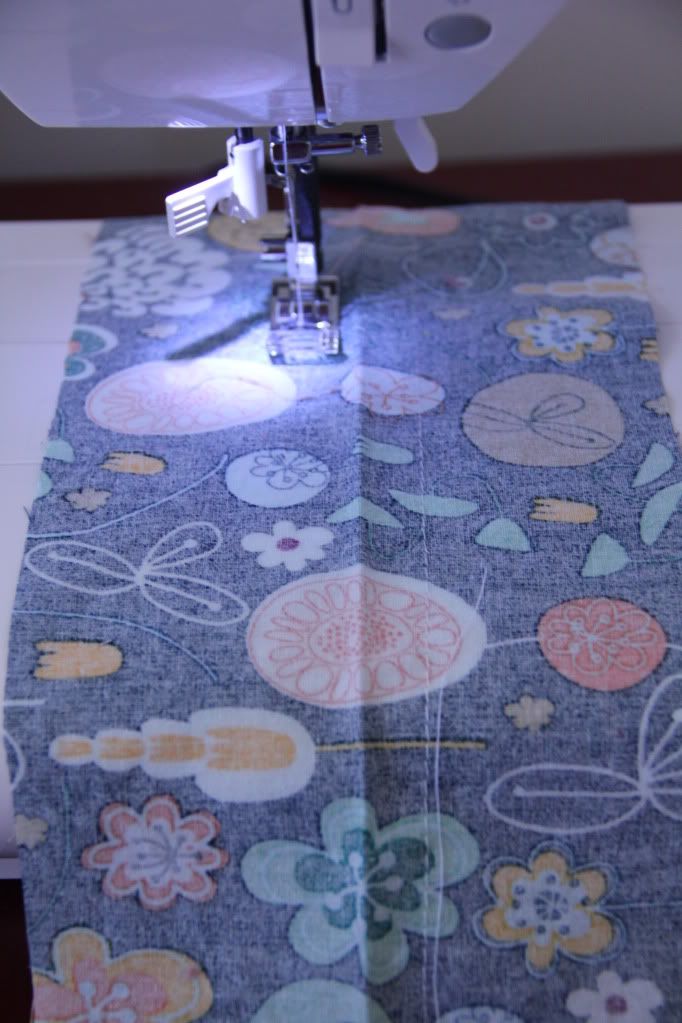
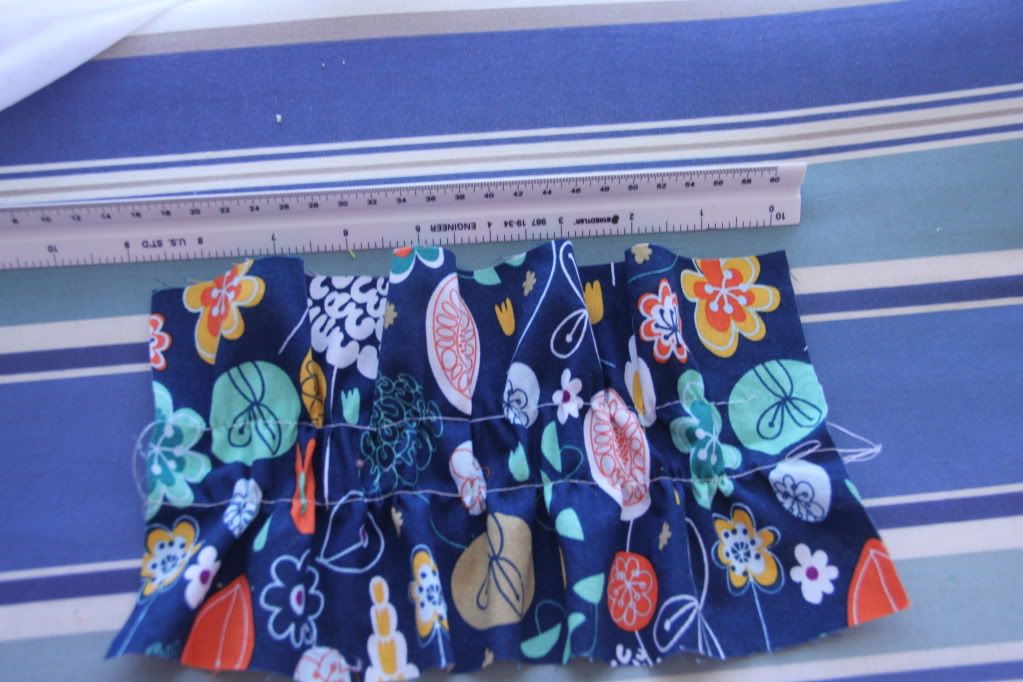
Take the main exterior piece (5.5x13) and sew two lines of gathering/basting stitches down the center about 1 inch apart 
Gently pull the top gathering threads together and slowly work the gathers until the whole piece is 9 inches long. Press the gathers into place (aka: slam your iron down on the whole piece of fabric and you're good! Oh wait, I'm the only one sewing with a toddler pulling on my leg?)
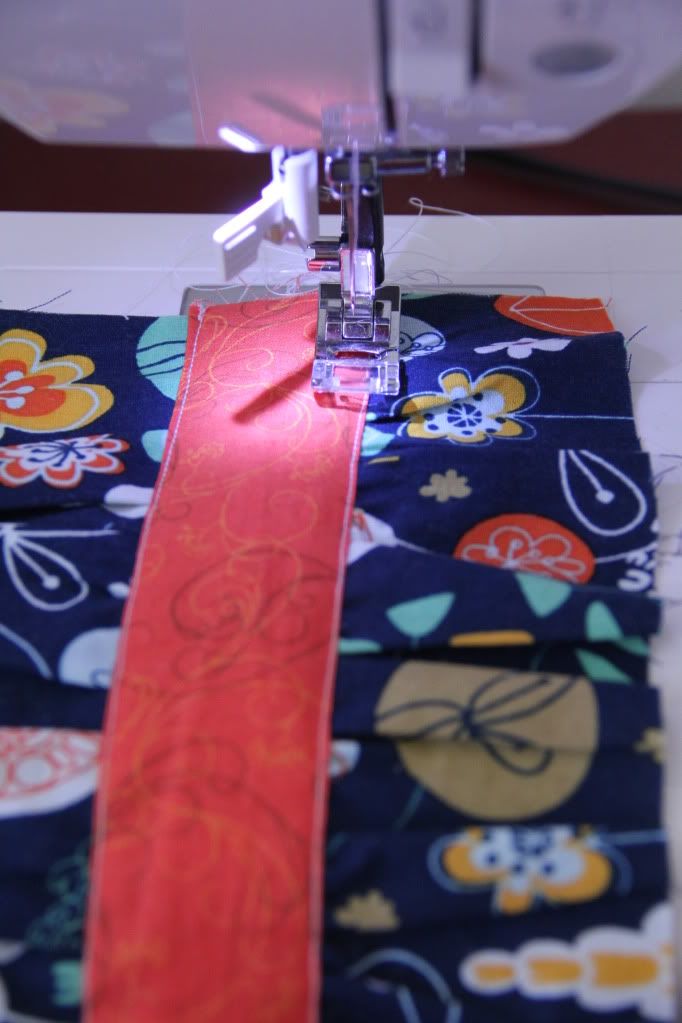
Take the front band piece and lay it down the center of the front main piece over the gathers. Topstitch (1/4" from the edge) along each side of the band. 

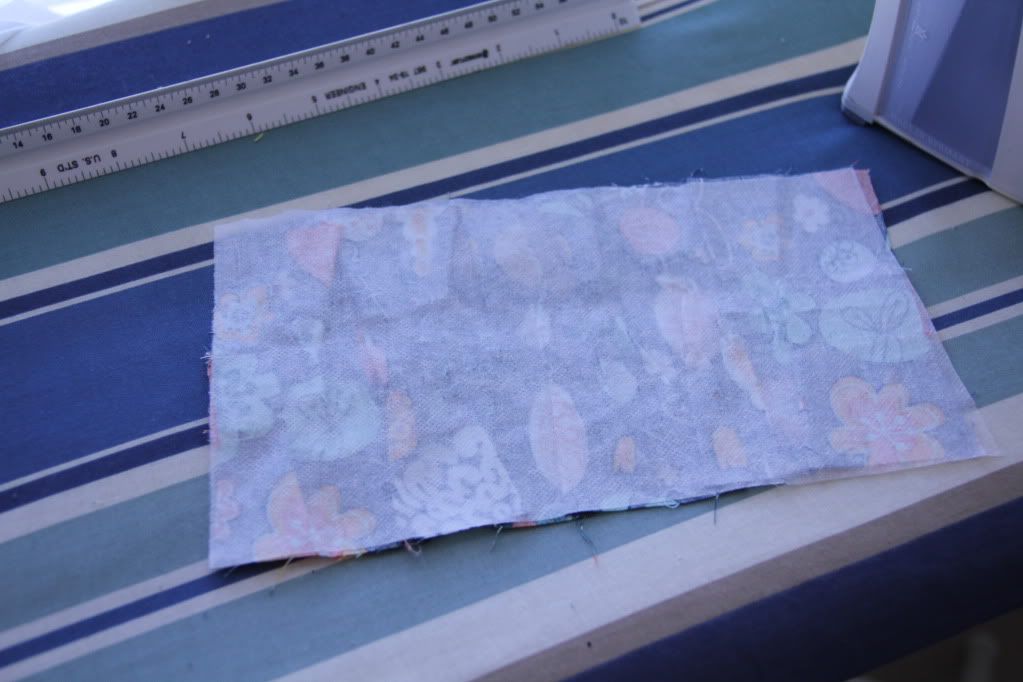
Iron the 5.5 by 9 inch piece of interfacing to the wrong side of the front piece. This will hold it all in place. 

To make the optional card holder:


Apply interfacing to half of the piece and fold it in half with wrong sides together (so you end up with a 3.5x9 piece). Press.
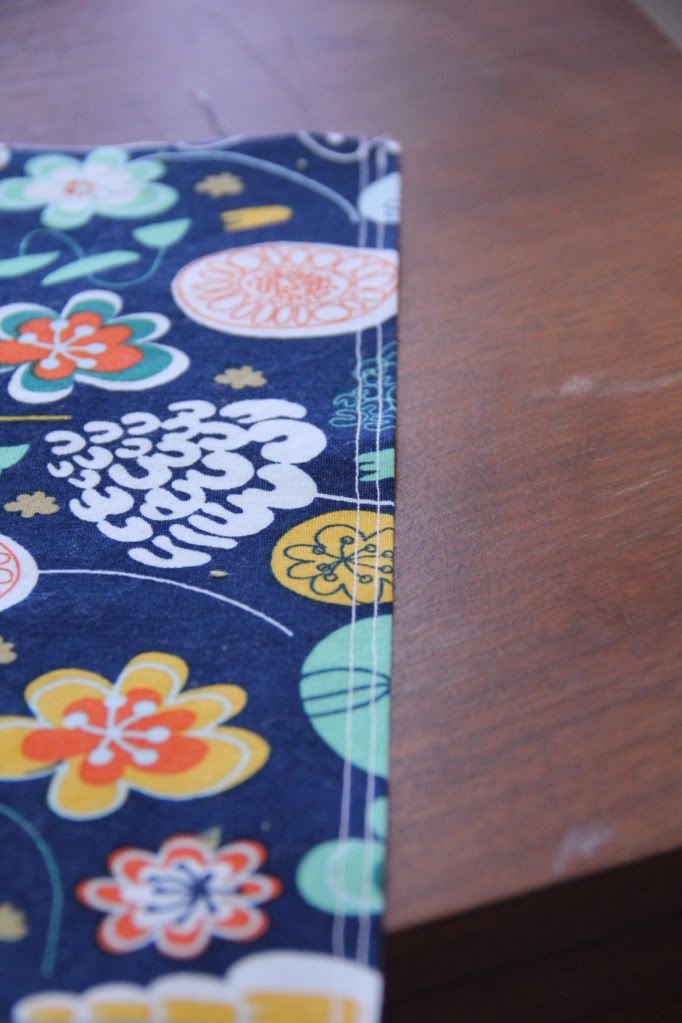
Top stitch along the folded edge. Top stitch a second line under your first line. 

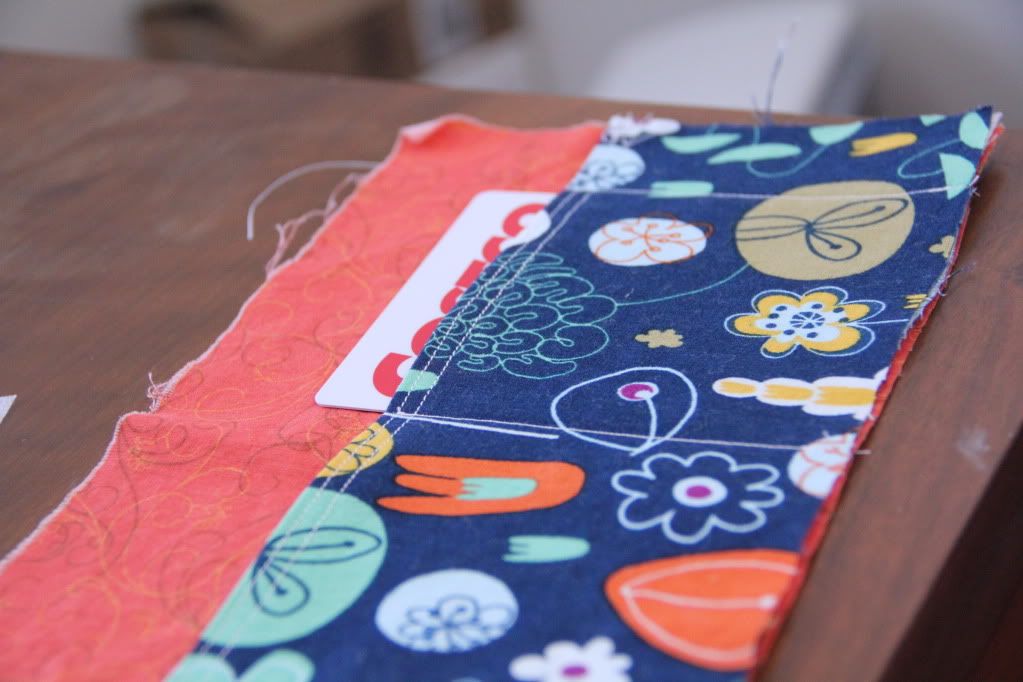
Take one piece of lining fabric and lay your card holder fabric with raw edges together and pin. Sew a seam down the middle of the card holder piece. 

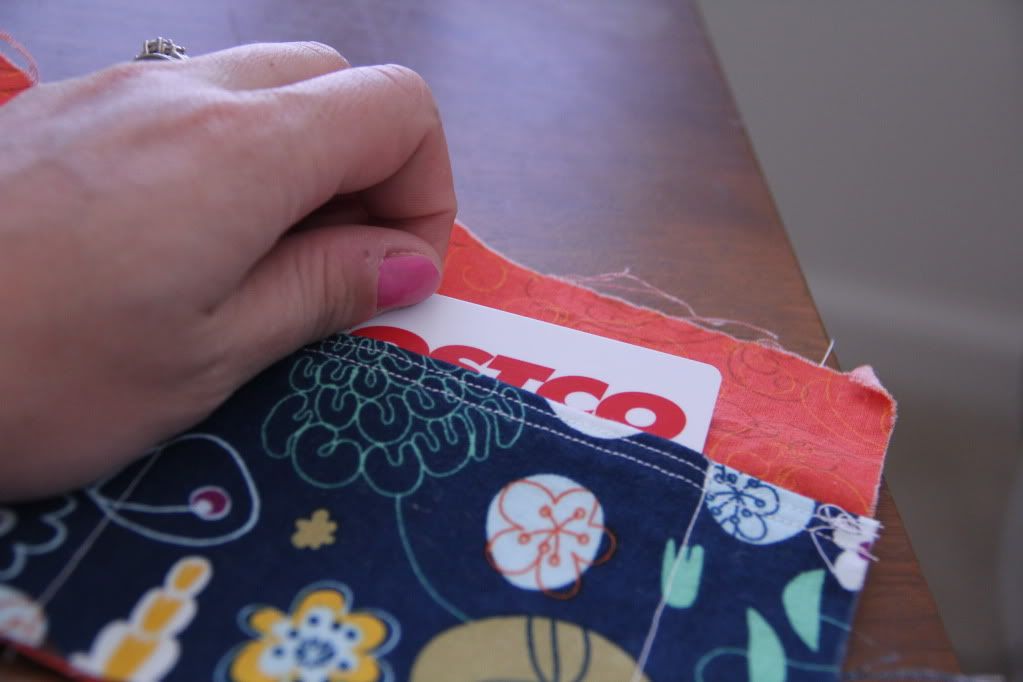
Grab one of your credit cards and use it to measure your card 'pockets'. You can decide how tight you want to make them. I like them pretty tight so they won't fall out. Mark the edge and sew a line down the sides to create a pocket. Decide how 'high' out of the pocket you want the cards to sit and mark a line along the bottom of the card. Sew along that line to finish your pockets.
 
Now for the zipper! Don't be intimidated, it's not that bad!

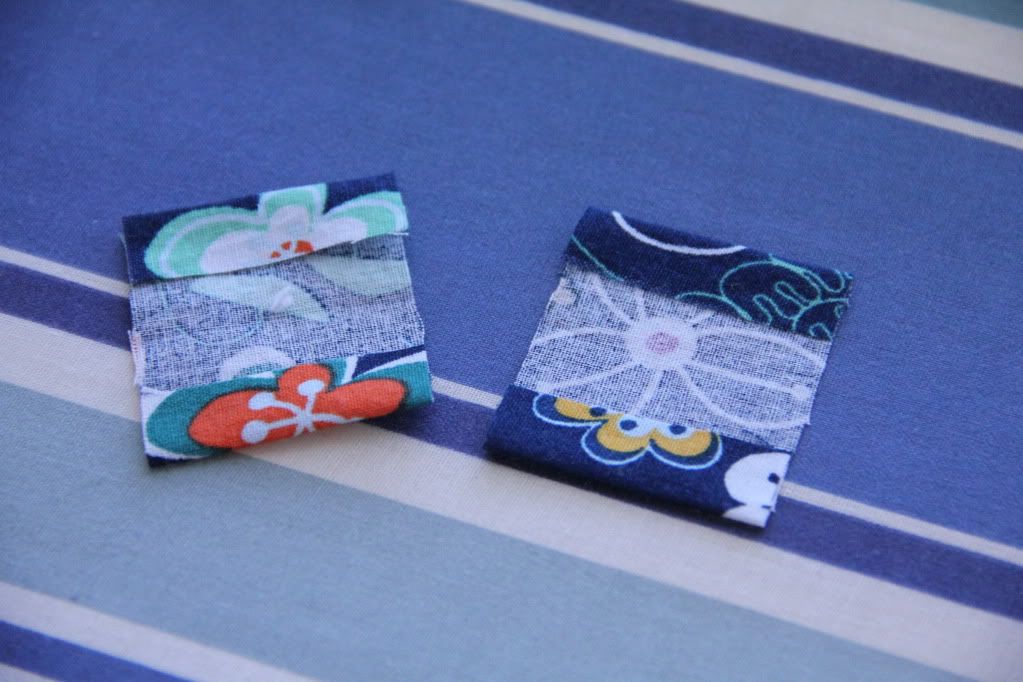
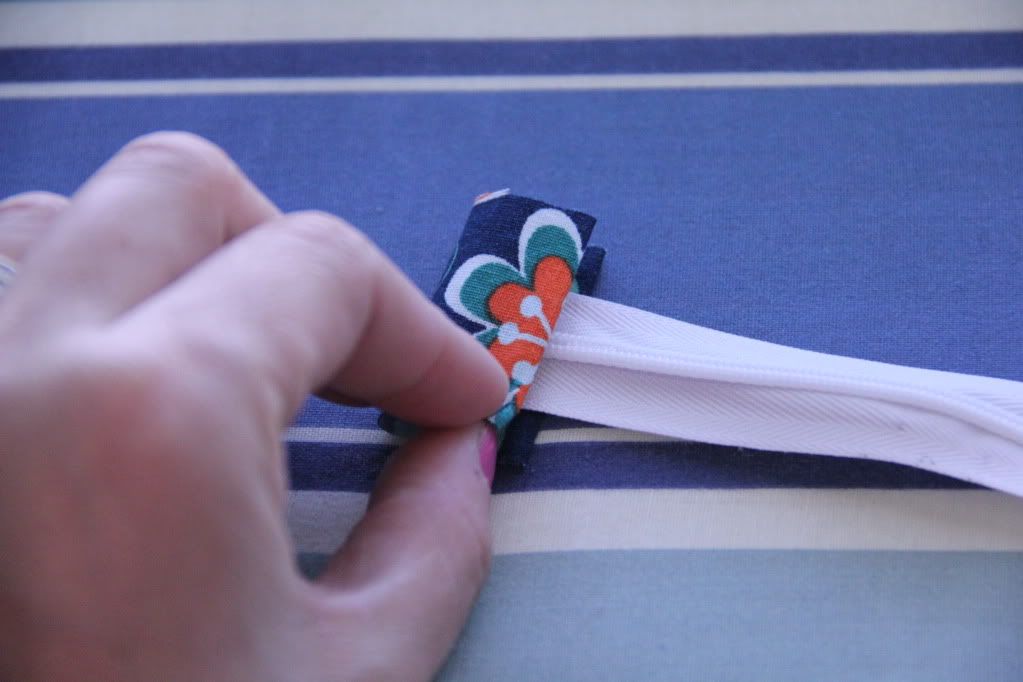
Fold your two small piece of zipper fabric in half width wise. Turn each raw edge in so that they meet in the center and press.

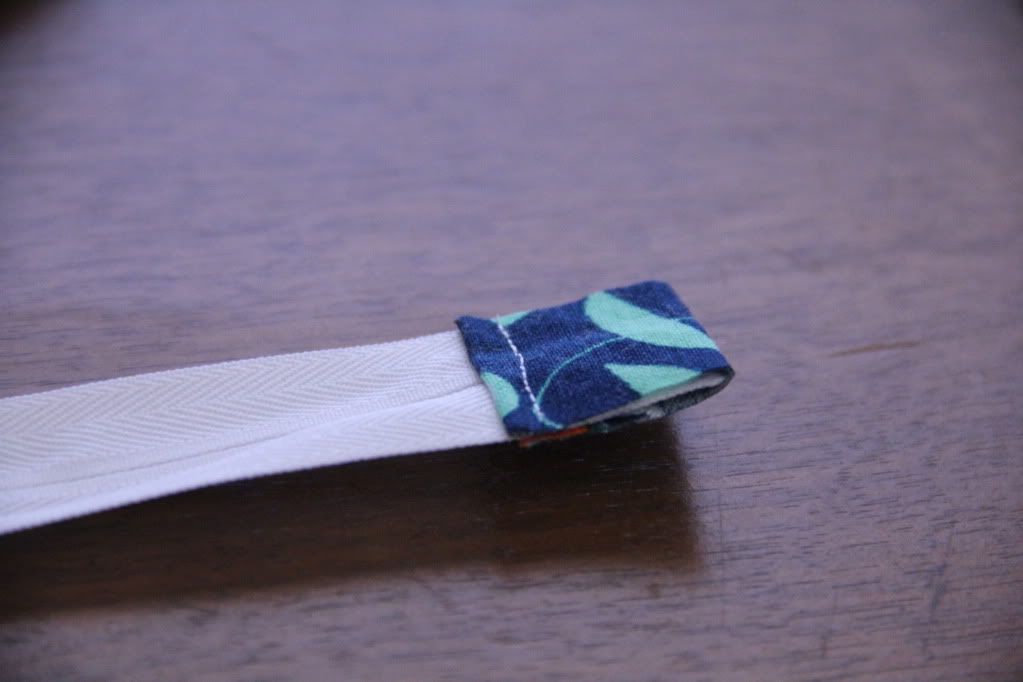
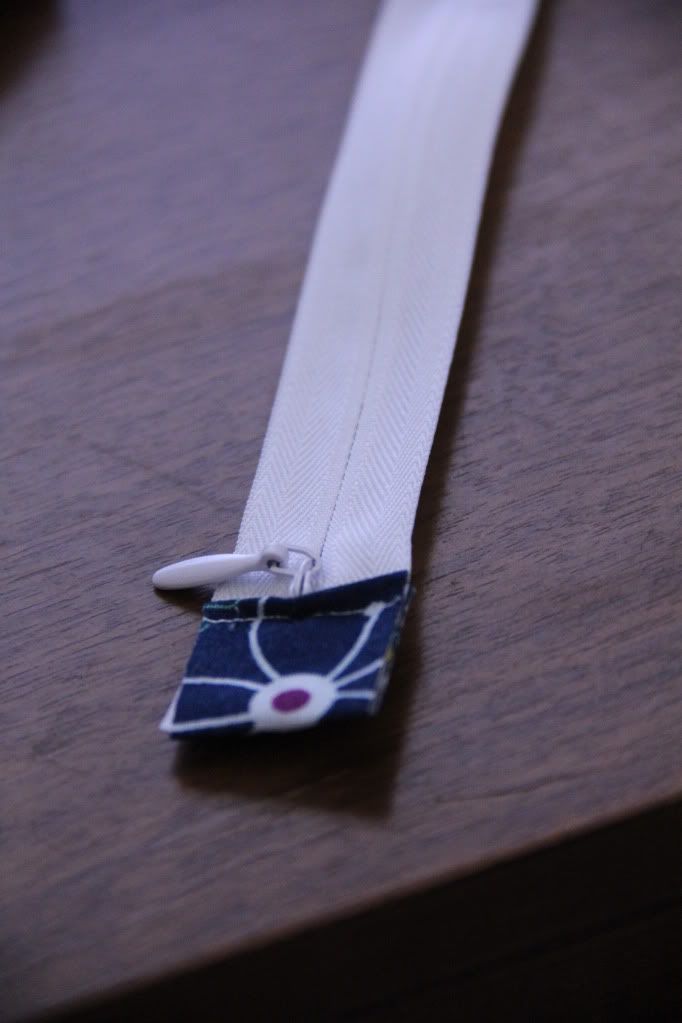
Sandwich the fabric around the ends of the zipper.


Topstitch straight across the zipper. THE LENGTH OF THE ZIPPER SHOULD MEASURE 8.5" FROM END TO END INCLUDING THE TABS. If you need to make adjustments to your zipper do so according to package directions.

Assembling the Clutch!


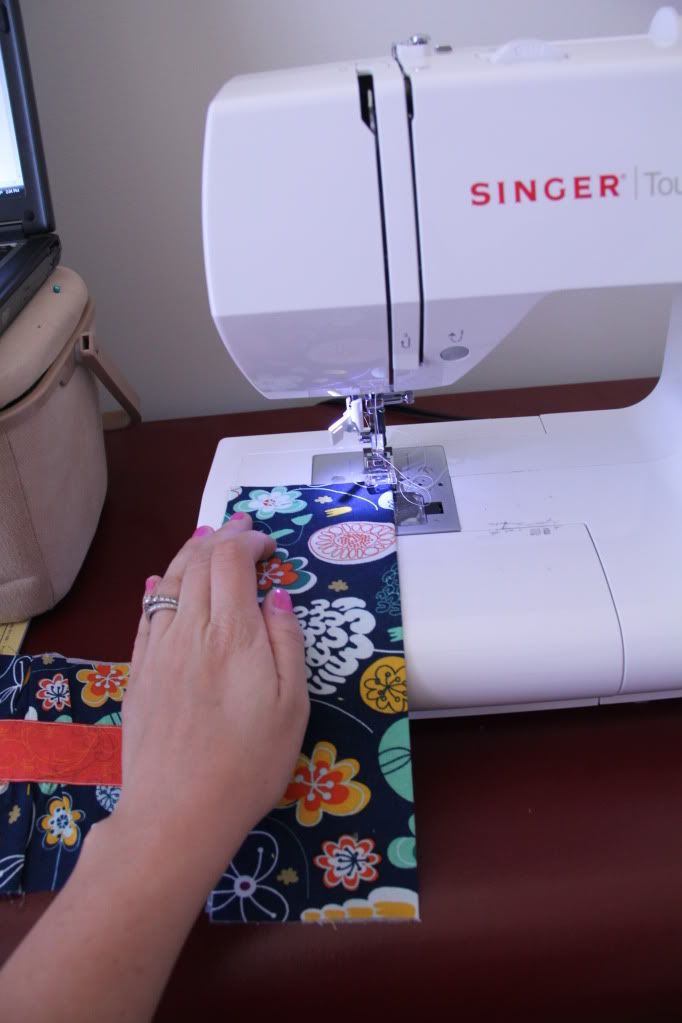
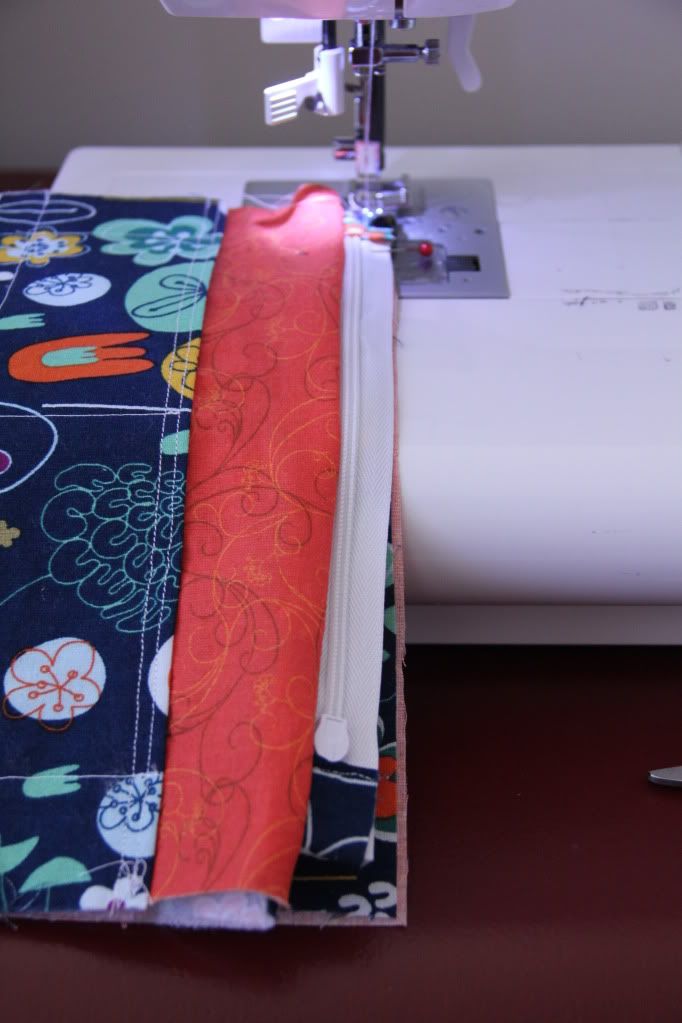
Place your gathered exterior piece right side up, put the zipper teeth side down with the pull tab to the left. Then put the lining piece with card holder wrong side up. (Right sides of fabric are touching.)
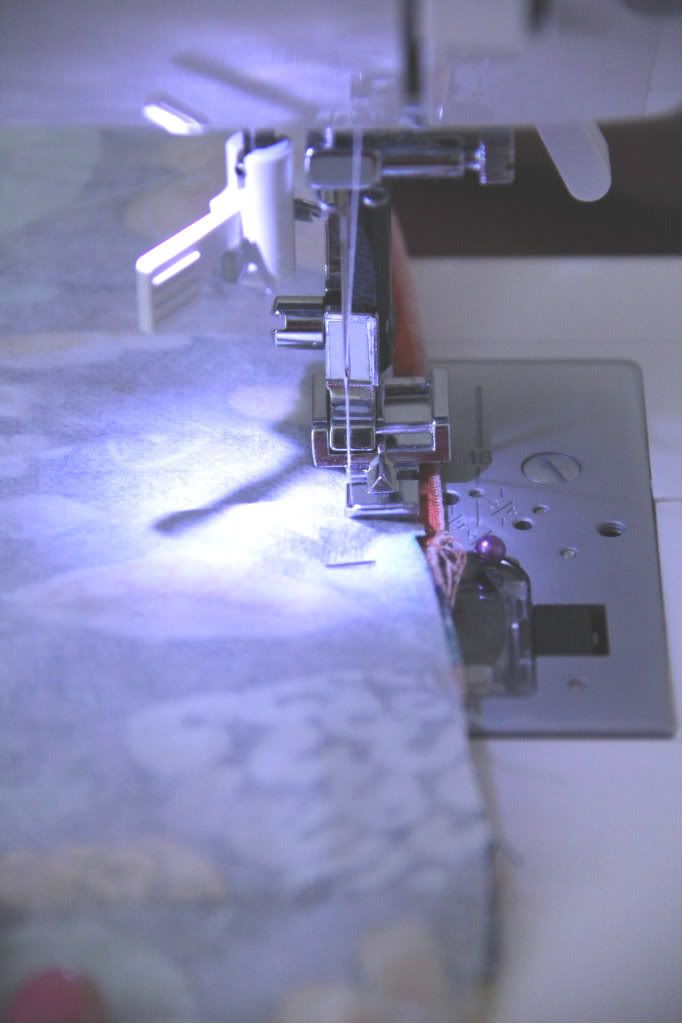
Using the zipper foot, sew along the edges of the 'zipper sandwich'.

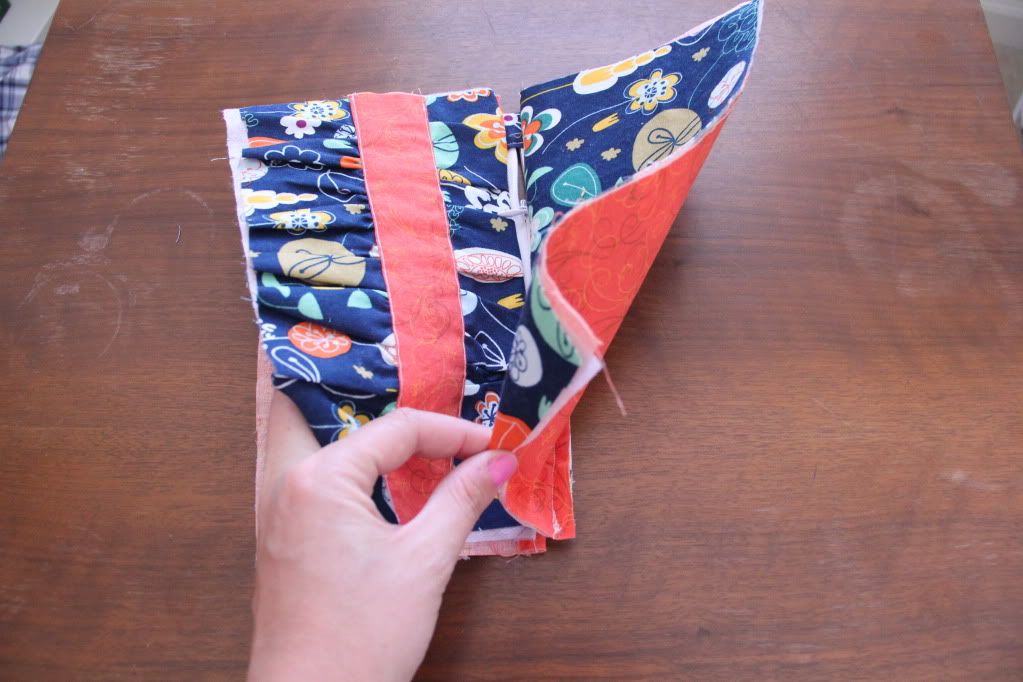
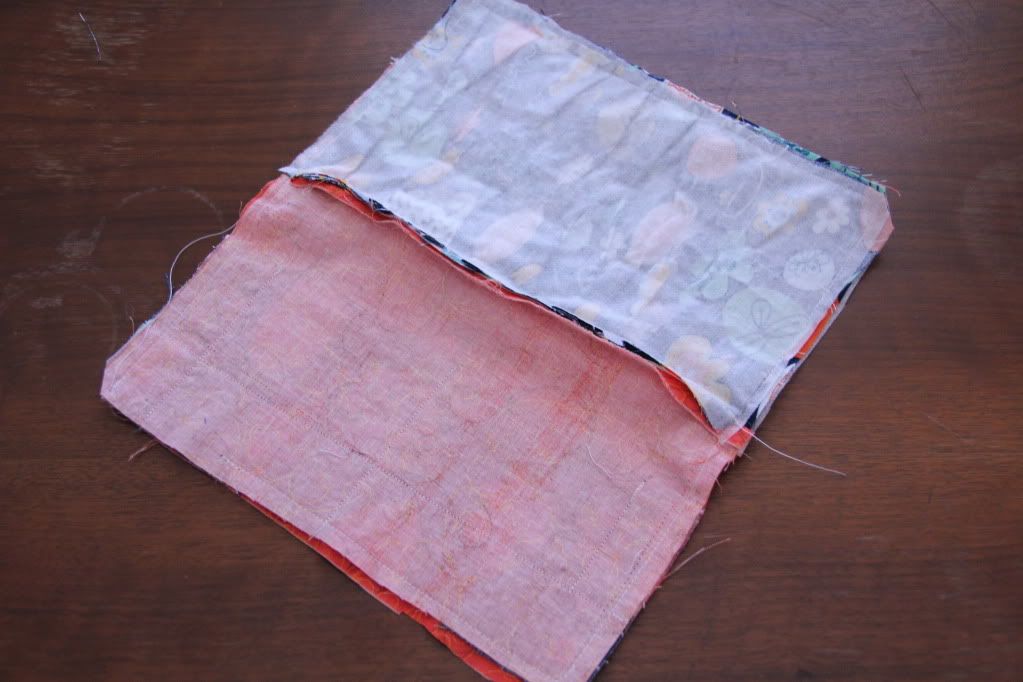
 Flip the pieces so the wrong sides are together.

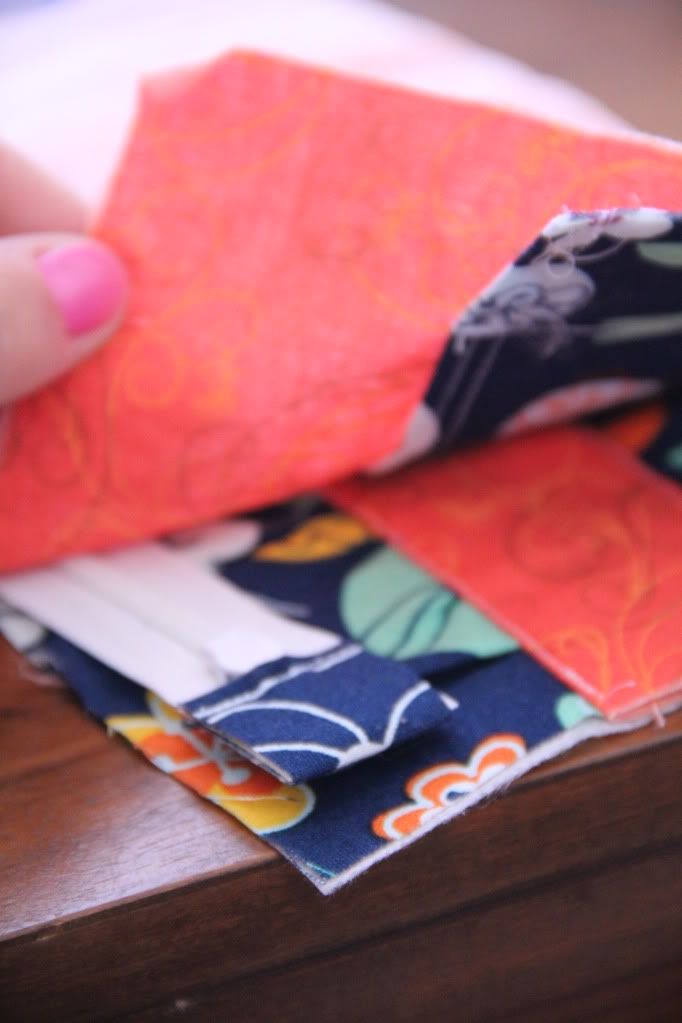
Grab the other exterior piece and place it right side up.  Put the zipper teeth side down with the pull tab on the right this time. Place the remaining lining piece wrong side up on top of the zipper.  Pin in place, sew.  Flip pieces with wrong sides together. Press! (I had it wrong in the picture above. My blank lining piece should be upside down and laying on top of the zipper!)

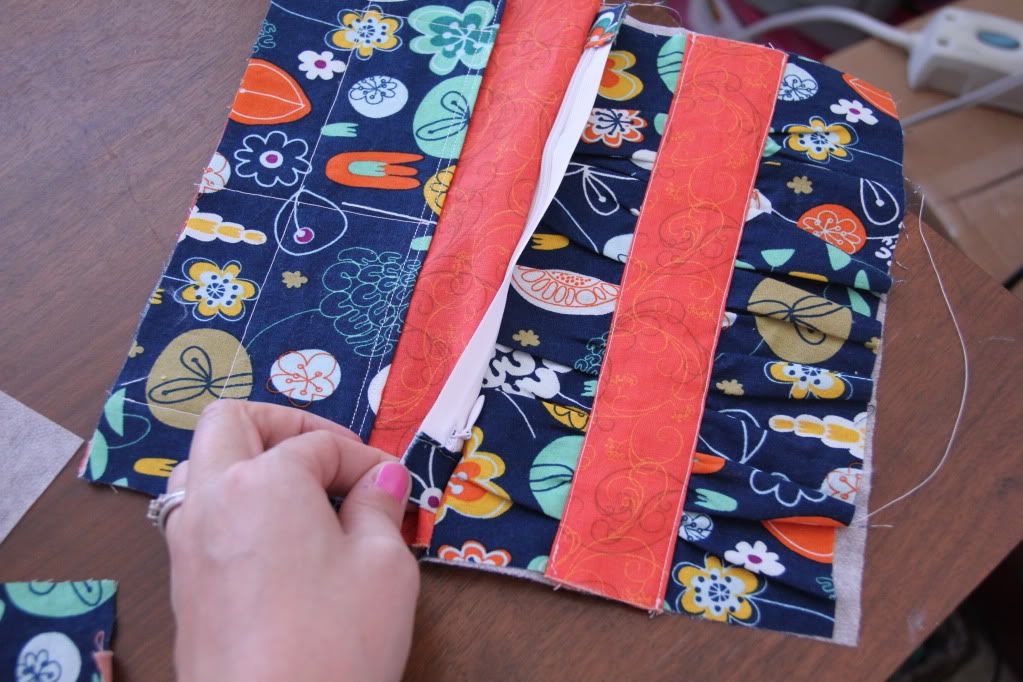
Now open it up and sew a line of topstitch down both lengths of the zipper (I also forgot to do this so you won't see it in any of these pictures. It just keeps the fabric from getting in the way of the zipper). It's starting to look kinda cute now, right?! Almost finished!

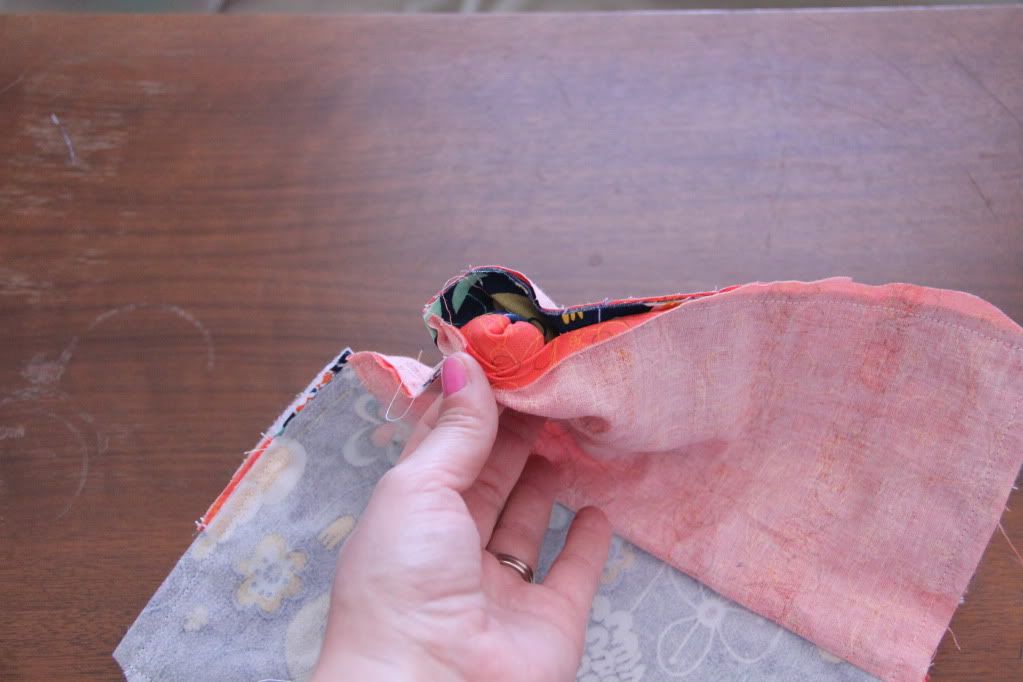
Open your zipper up halfway. Place the lining pieces with right sides together and the exterior pieces with right sides together.

Sew all around the edge with a 1/4" seam allowance and leaving a 2 inch opening on the lining side to turn your clutch right side out. (It helps to sew with a slightly larger seam allowance when going around the lining pieces.)


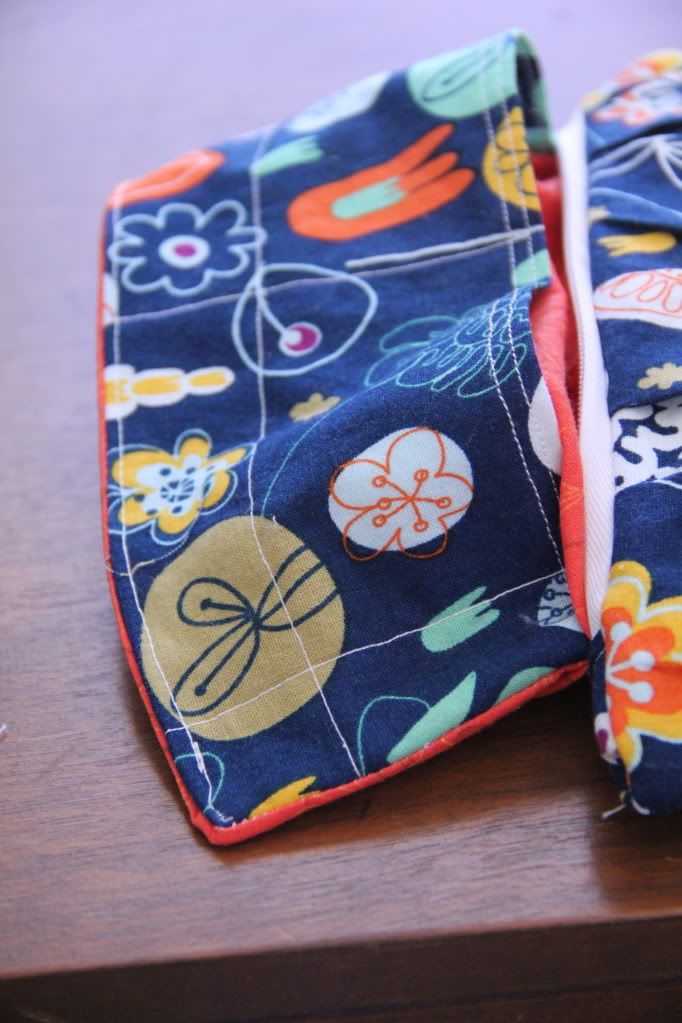
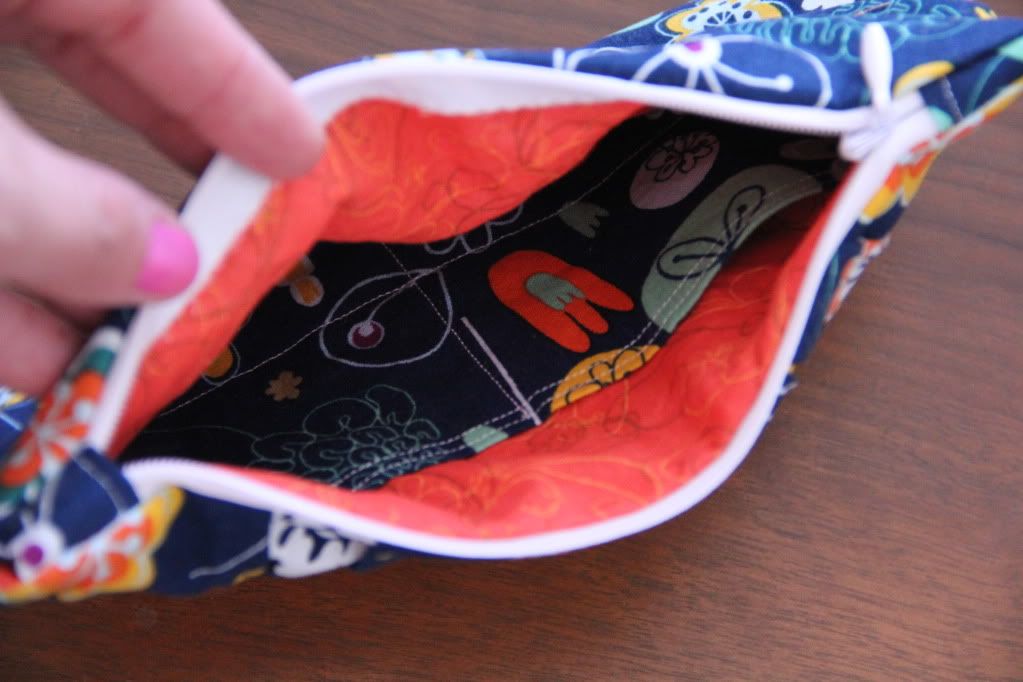
Turn the clutch right side out. Push the corners out. Stitch the opening in the lining closed with a small seam allowance.


Tuck the lining into the clutch, press, and you're done! Thanks, Noodlehead, for the great tutorial!



Jun 6, 2012

Bedroom Tour: Baby Boy

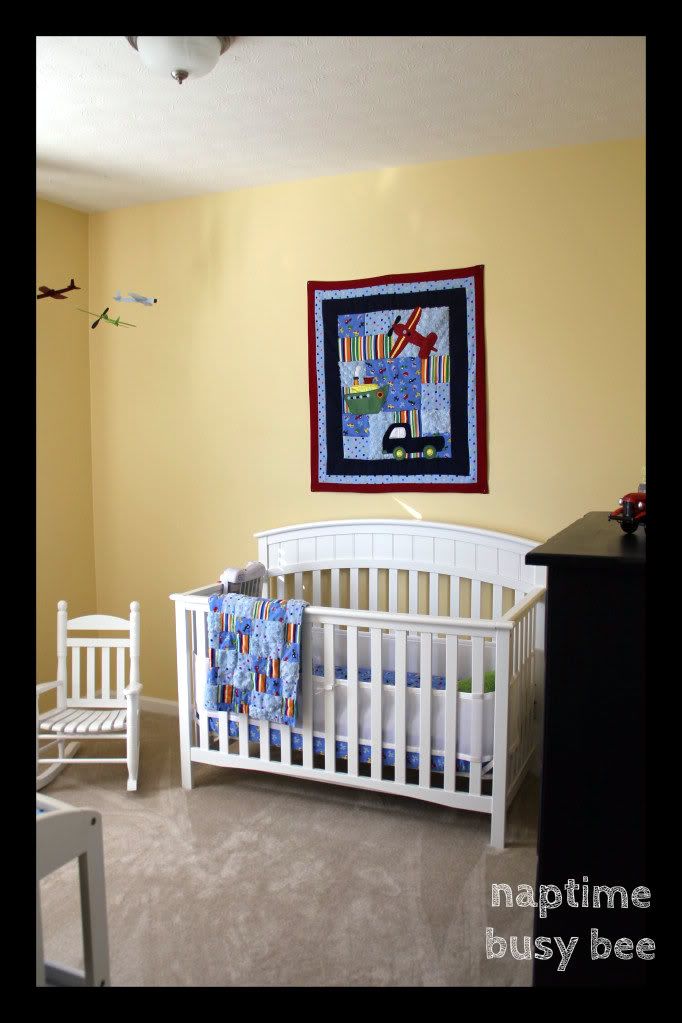
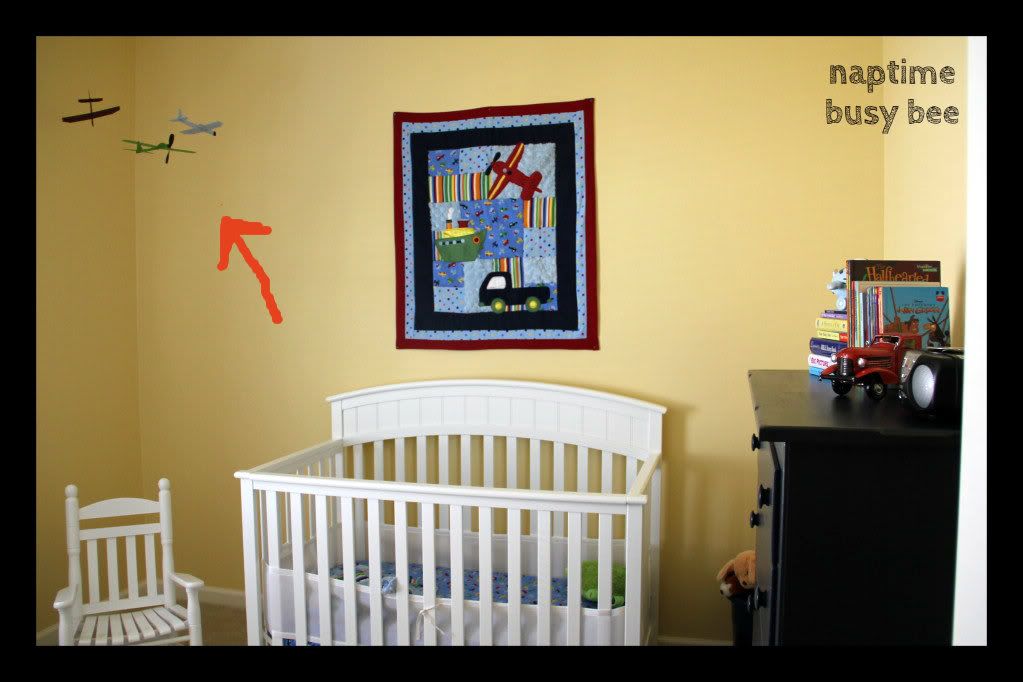
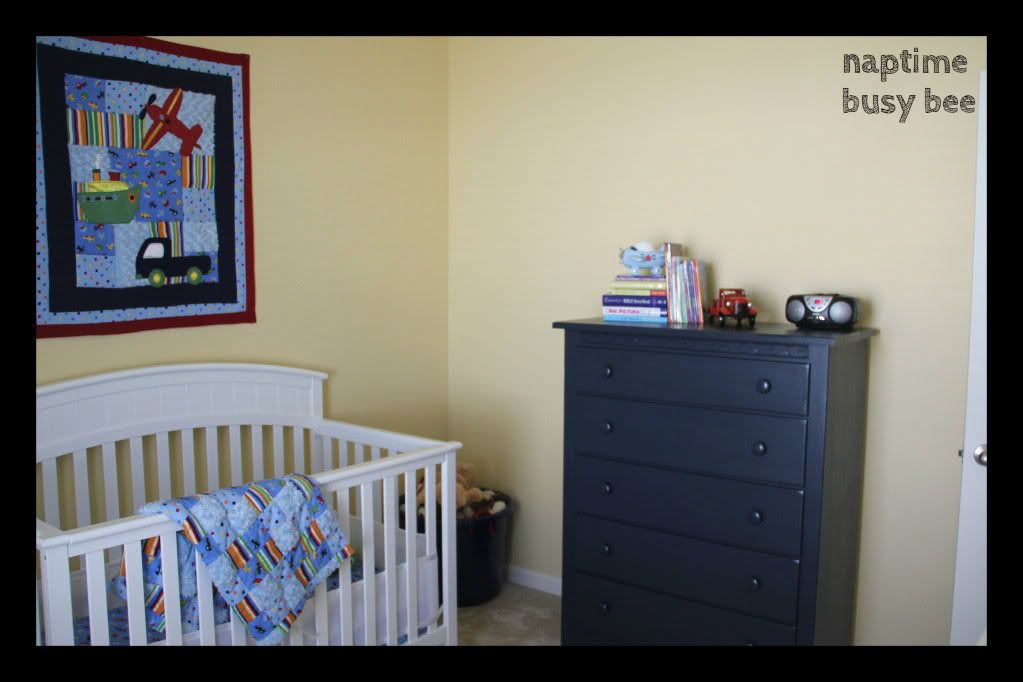
For a few reasons that would take me way too many hours and cups of coffee to explain, we didn't have an actual room for our son when he was born. We were transitioning between jobs, states, and houses in the months leading up to his birth and when he was an infant. When he was 7 months old we moved into our house and I was *finallyFinallyFINALLY* able to decorate a nursery for him. I love that it's a little bit 'older' and not too pastel-y or teddy-bear-ish. It fits him.


The bedding and the wall hanging were all sewn by a mixture of people - my grandma, my aunt, and myself.


(Excuse the really blurry bright weird picture...)
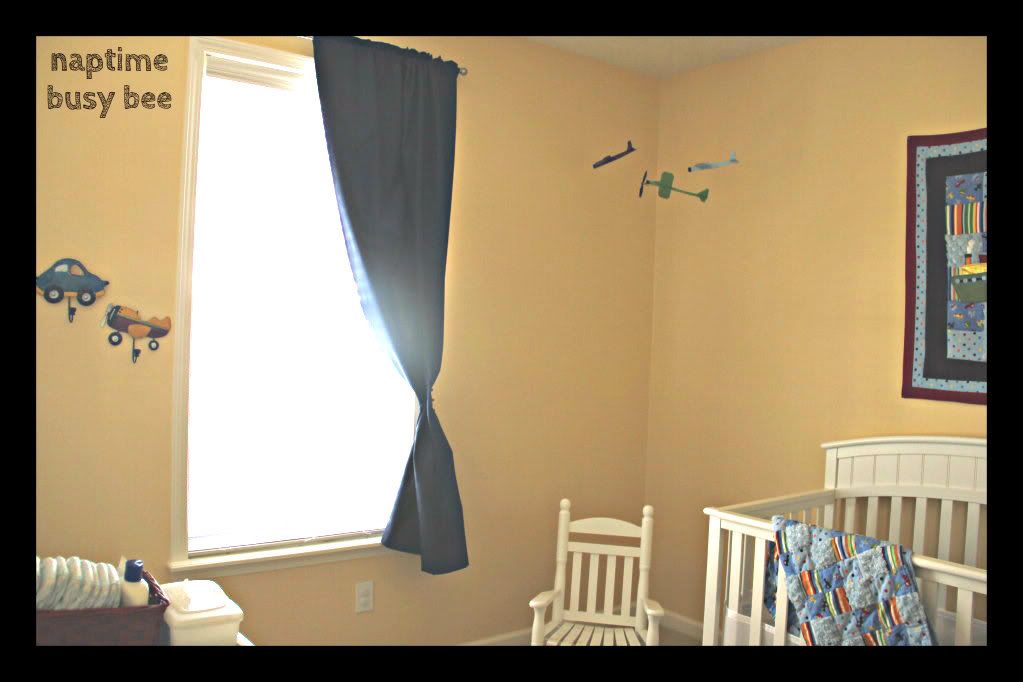
Our house came with all the wide slat wooden blinds and I love the trim around the window so I thought about forgoing curtains. However, the munchkin decided he would only sleep when it was dark. Have I mentioned I love blackout curtains? I do. They save my life everyday.


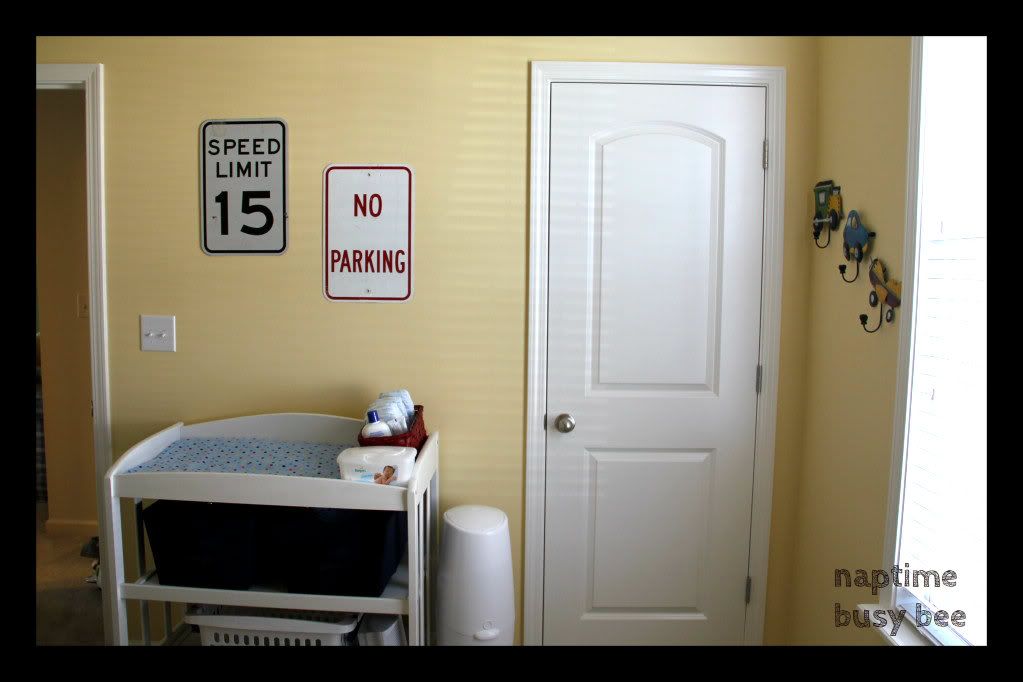
I love the addition of the metal traffic signs. Thanks to my husband for snatching them out of the trash on a job site at one of his college internships ;-)


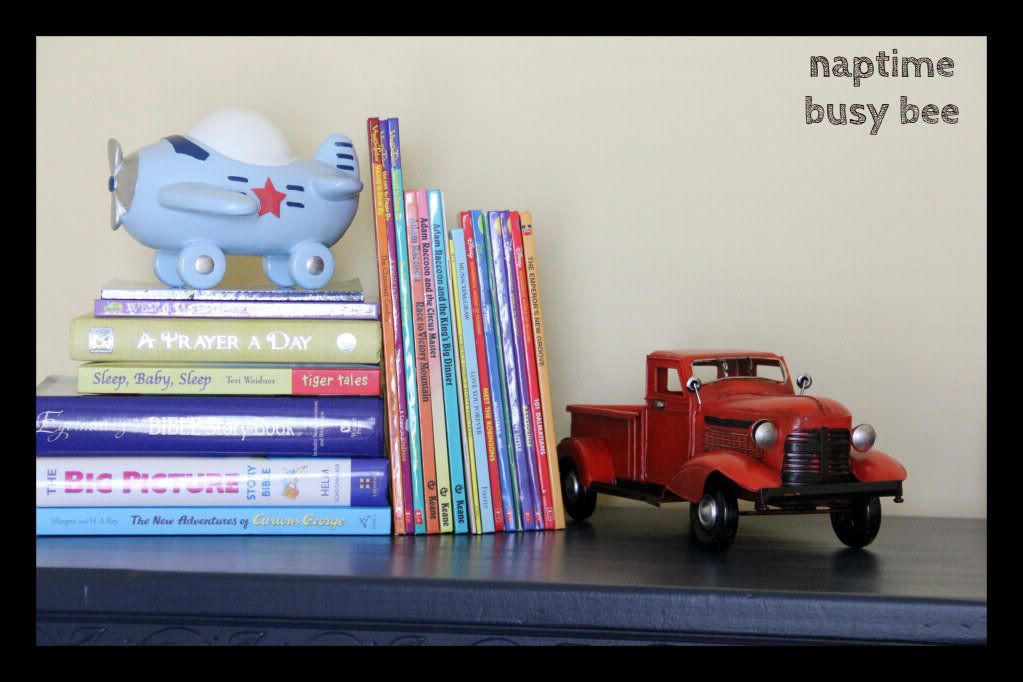
This extra large tub is perfect for storing blankets and stuffed animals. And this vintage looking truck makes me happy inside.


I love the size of this dresser because it holds so much but doesn't have a massive footprint. I refinished it in the navy color and I love how it fits in the room now. I'm kinda matchy-matchy sometimes.... I know, right... breaking alllllll the designer rules! I do have plans for the wall above the dresser - don't worry it won't stay blank!


I really wanted some airplanes hanging from the ceiling, especially since we never got a mobile and he doesn't really care about one now. After drooling over some planes at Pottery Barn and subsequently realizing I didn't want to pay more than a tank of gas for them, I decided to make my own using the little balsa wood plane kits from the dollar store. In less than 2 hours, I had planes that even coordinated with his room for less than $5. I'll take it!

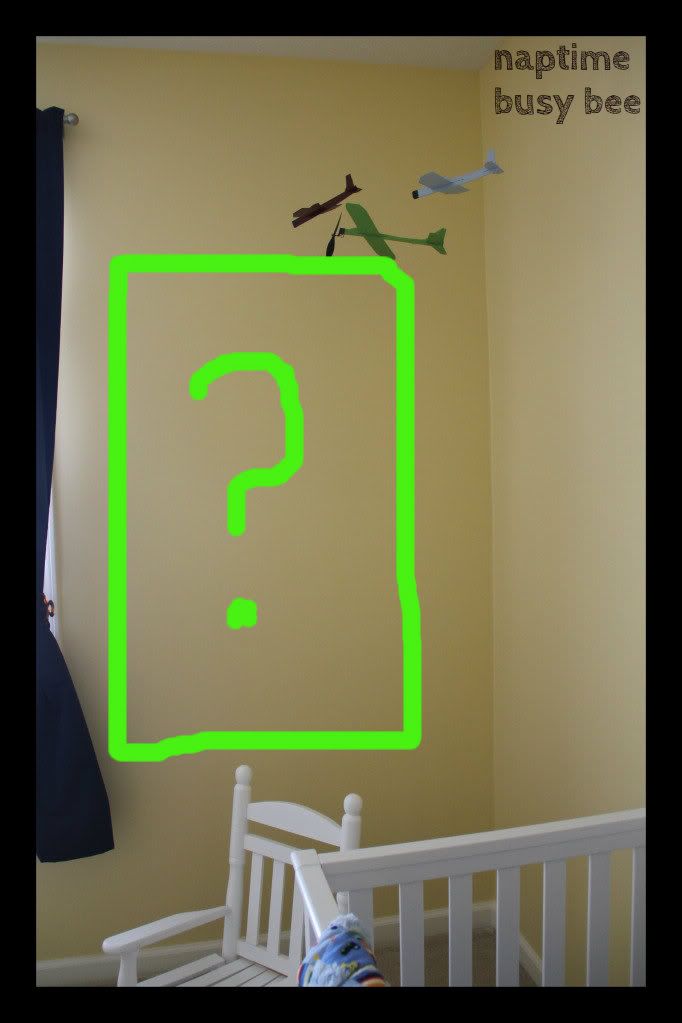
Now here is where I need your help. I have this 'blank spot'. Originally, I had envisioned making some Ikea-hacked spice rack bookshelves. Apparently, the whole rest of the world was also jumping on the spice rack bookshelf wagon and they are sold out across the nation. Drat. My handy hubby offered to make them for me but now I can't decide if I really want shelves there. We have so much book storage as is in other parts of the house I feel like it's sort of unnecessary. I DO think that something long/tall needs to go in the space. But I haven't decided what exactly. Separate book shelves? Art? A huge lifesize poster of Larry the Cucumber? (no, sorry.) Soooooo.....


What would you put here? Ideas? Thoughts?  Can't wait to hear from you - this empty space on the wall is killing me!

Jun 5, 2012

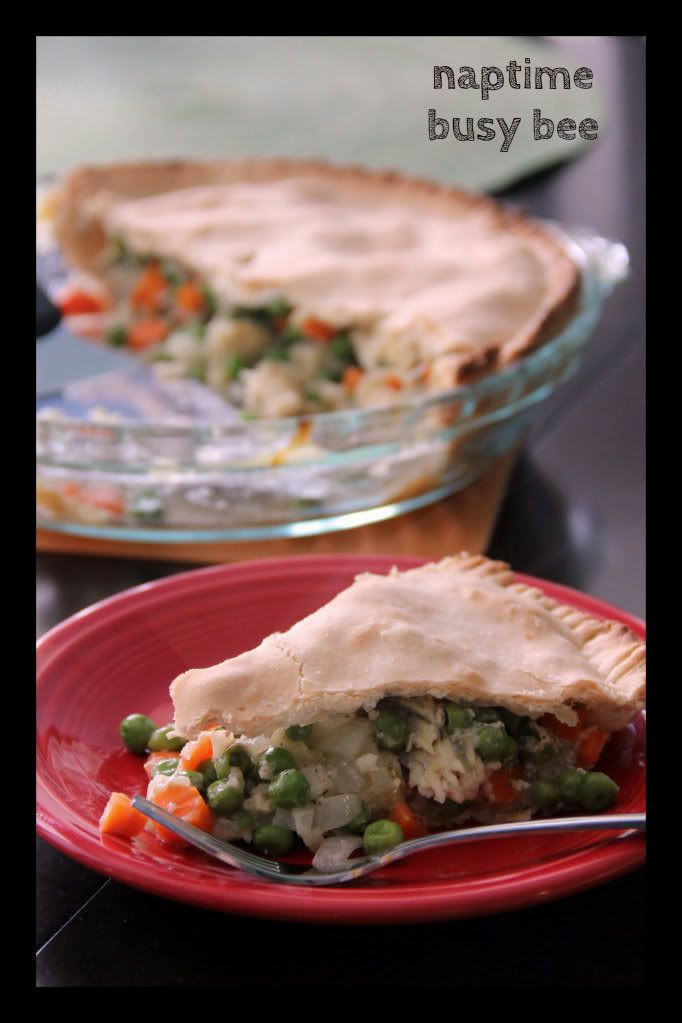
Tasty Tuesday: Chicken Pot Pie

Here in Indiana we have been having some bizarre-to-the-o weather. 50 degrees in June?! I'm thisclose to lighting the pumpkin candle, making chili and cornbread, and pulling all my sweatshirts out of the garage. Since cold = comfort food around here, I thought I'd share one of our favorite warm and quick to prepare meals.


Chicken Pot Pie 

Ingredients:
3 Chicken Breast, cooked and shredded
1 Onion, chopped
1 C Fresh or Frozen Peas (or 1 can)
1 C Fresh or Frozen Carrots, diced (or 1 can)
2 T. Butter
2 T. Flour
1 tsp Salt
1/2 tsp Pepper
1/4 tsp Thyme
1/2 C. Chicken Broth
1/2 C. Milk
Pie Crust

Heat oven to 425. In a small saucepan, mix together butter, flour, salt, pepper, thyme, chicken broth, and milk. Stir and heat until bubbly then cook for 1 minute. Mix the sauce into the chicken, onion, carrots, and peas. Pour in to a prepared pie crust. Top with crust. Make slits in the top and bake for 35-40 minutes. Makes 1 pie.